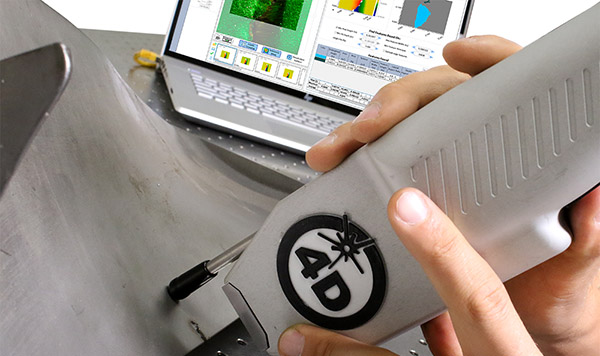
By measuring a part’s nominal defect features right up to the line of the specification, customers find that they are able to pass more parts, and rework many parts that a fingernail test, comparator, or pocket stylus would have failed.
The 4D InSpec surface gauge is the first handheld, precision instrument for non-contact surface defect measurement. With micrometer-level resolution, portability, affordability and ease-of-use, 4D InSpec puts high resolution 3D surface measurement where it’s needed: on the factory floor, in machine shops, and in field service applications.
Even with this surface gauge being precise and capable of extensive analysis, it’s incredibly easy to use. Non-experts can take measurements with ease after just minutes of training.
4D InSpec instantly quantifies defects such as pits, scratches, nicks, dents and bumps. It measures features such as edge break, radii, rivet depth and dot peen depth up to 100 mils (2540 micrometers) deep. 4D InSpec is far more repeatable and accurate than visual comparison techniques typically used for surface defect measurements. And unlike high-end metrology systems, it is rugged, flexible and affordable, to measure a wide range of part geometries in the most challenging environments.

The 4D InSpec can be handheld to access tight corners or to sample large surfaces directly on components. An optional fold mirror accessory lets the system function like a borescope to access sidewall features without line of sight. One-button operation and immunity to movement make it easy to align and measure, while a rugged design and single cable tether withstand the rigors of daily use.
4D InSpec makes it fast and easy to obtain repeatable quality control data. An intuitive, touchscreen interface handles setup, operation, analysis and report generation. The 4D InSpec can also be mounted on a robotic manipulator for fully automated measurements of complex components.
The included software automatically bins defects in the measurement area, and 3D feature analysis calculates their height, volume, area, slopes and location. Imagine measuring an area of corrosion pits and knowing how many of them are deeper than your spec, in a single button click. The operator can choose from 2D traces or 3D plots to view defects in greater detail. The system supports easy data transfer to quality control systems via LAN, USB or WiFi for rapid, networked, pass-fail analysis.
By joining hands and leveraging cutting-edge technologies, we develop innovative solutions to drive societal progress and shape a better future.
With deep expertise and extensive experience, we deliver precise and efficient solutions to ensure every project meets the highest standards.
We integrate cutting-edge technology with continuous innovation to develop breakthrough solutions that drive industry progress and create lasting value for our clients.
We offer round-the-clock premium support services, ensuring rapid response and efficient problem resolution, allowing you to focus on your core business without worries.